
The various steps in paper making are fun and attainable for ages as young as 4. Great if you have an outdoor area, but if not, we have covered areas inside as well with waterproof material (follow ink below). The project incorporates recycling, design, and easily attainable supplies.
Supplies:
- Blender
- newspaper clippings, flowers, old maps
- food coloring, liquid water paints (or acrylic paint) to color pulp
- Lint from dryer (yup it is cheap and the easiest binder for a cotton paper pulp)
- a tray (at least 8"x10") to hold paper pulp and water mixture
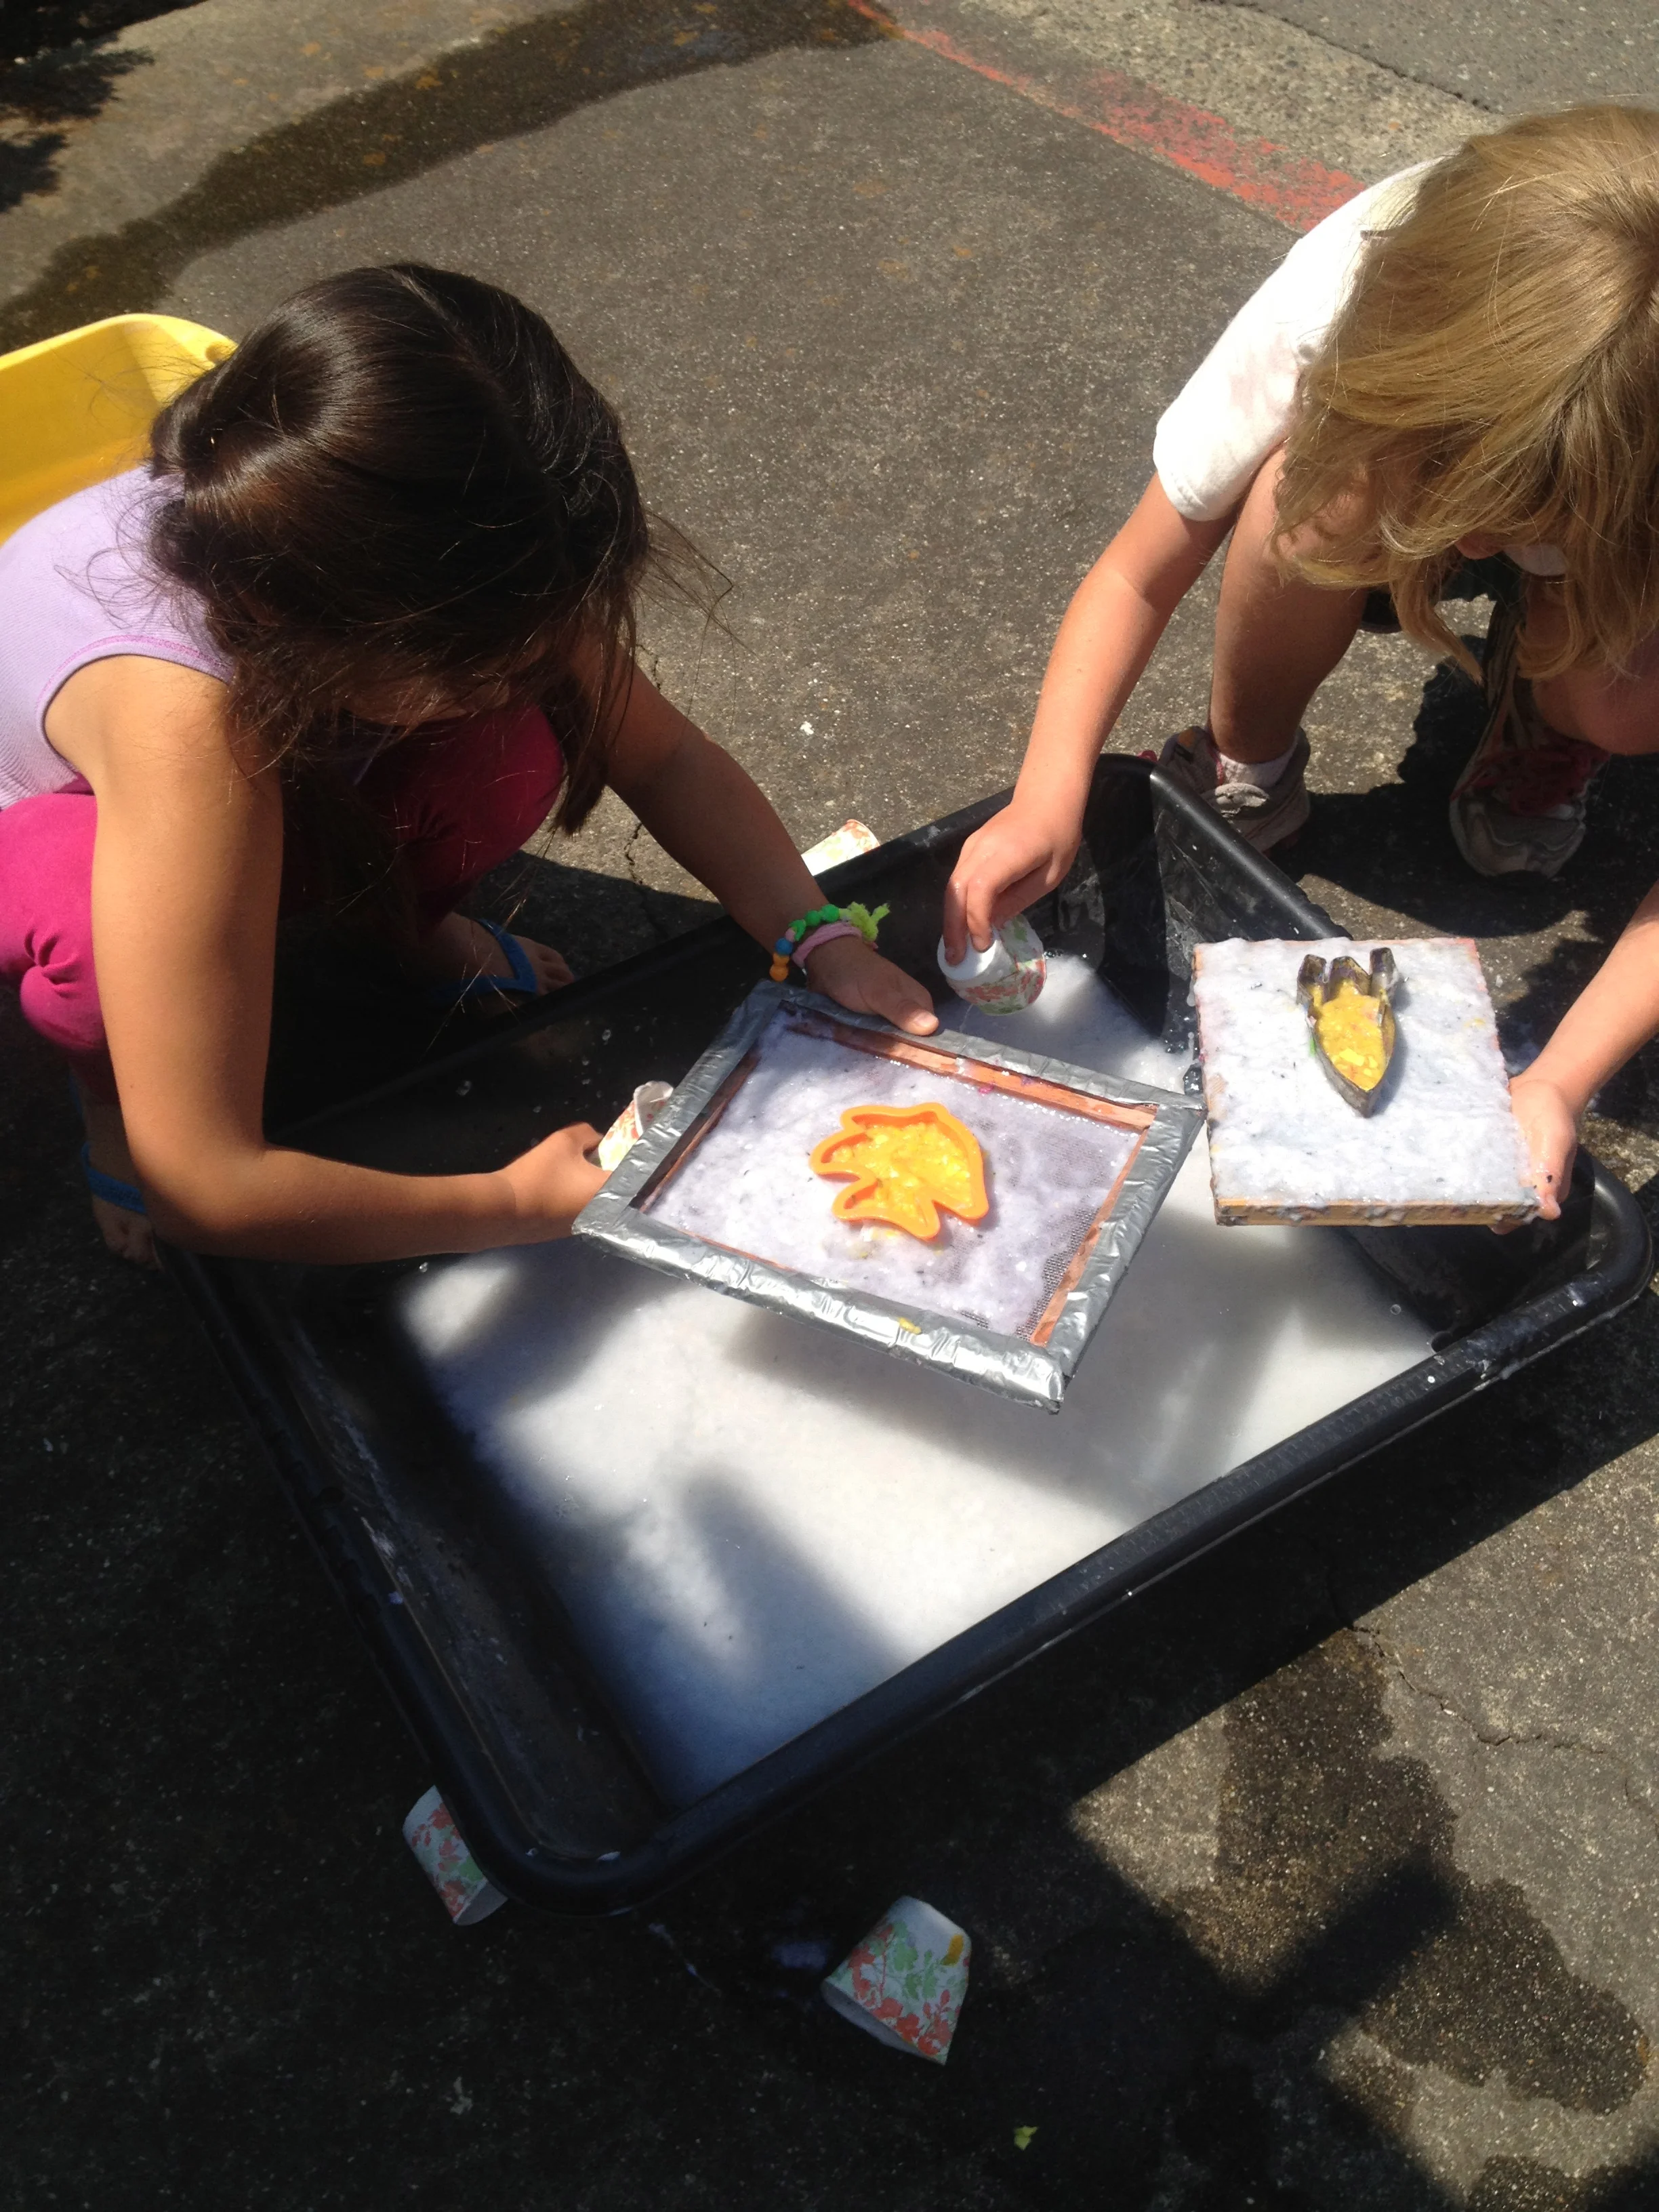
- embroidery hoop for each student (picture above I used dollar frames and screen material stapled to the outside. I find the embroidery hoops more convenient. Round paper is fun too! However, if you want to create a sketch book cover or other books, the frames are your way to go.
- cookie cutters
- nylon, tightly woven fabric (I go to goodwill, or have bought large panels at IKEA)
- starch or gelatin (used as sizing to control water absorption and create a strong paper)
- first step is to create the paper pulp by adding the lint and a small amount of water. This water is just to create a smooth texture while blending the lint mixture. After blending a bit you may add torn up newspaper, colored papers, flowers etc. Mix again until the new added papers are small bits. The kids LOVE being in charge of the blender (with adult supervision of course). This blended mixture is then added to your tray that has been filled 1/2 way with water. This is the time you will add approximately 2 tbs. of your starch or gelatin. If you are using larger trays, add just a bit more of the starch or gelatin. It is not critical how much you add. Too little will not bind the paper as well, but even that is ok. Mix it all up!
- If you would like to add color you may use food coloring, liquid water colors, or even acrylic paint. They all will create different strengths of color and opacity. Play and explore which you like best.
- prepare your embroidery hoops with the nylon fabric. Pull taught.
- dip embroidery hoops into the fun pulp mixture.
- your kids (students) will want to practice putting the frame all the way into the mixture, then pulling up straight. Talk about the resistance of the water and how they have to use there muscles while also using their eyes to keep it level.
- you can repeat the dipping procedure as many times as you like. Do make sure it is not too thin, as it won't release so well from the nylon (or screen). With each dip, make sure to stir up the water, as you want the pulp to be floating in the tray.
- Set aside on piles of newspaper, or on a Paper/Poly Drop Cloth.
- drying time depends on weather, but usually you can remove the handmade paper from nylon after 24 hours.
Note: if you are using the cookie cutters:
- instead of dipping your entire hoop or screen into the mixture, you will be using dixie type cups to pour the pulp over. Contrasting colors are fun. Pour first the outside area, Then pour a new color into the shape.
For added activity for older children:
- Cut out meaningful words to incorporate into their handmade paper. Messages, poems, or single words are a great literary addition.
HAVE FUN!